Make Ubuntu more like macOS
I've started a new job with NHS Digital, which means I've got a new computer to set up—and for the first time in like 15 years, I'm not setting up a Macintosh. Yes I'm one of those people.
The OS we're working with here is Ubuntu (through a VM hosted in Windows, which I'm going to really try to use as little as possible). And it's: not bad! Ubuntu feels remarkably modern. I spend a little time fiddling with Ubuntu when I was younger, and it always felt like a bit of a kludge to get working; but nowadays it feels cohesive, reliable, and somehow familiar. Through the magic of Electron, and macOS's POSIX-compatibility, a lot of the apps and tools that I use regularly are available on Linux, which means I'm spending a minimum of time trying to find out what the 'Linux versions' of my favourite applications are.
And where apps are missing, web apps are really stepping up to the plate. I think I tend to be a little elitist about my applications, preferring native (or "native-feeling") applications to the web whenever I can; but when I'm not on a Macintosh, the ability to log into an application running in Chrome is an absolute godsend. & so here I am on the pointy end of the only-on-Mac stick. Well.
Anyway, enough about me; here's how I reconfigured Ubuntu to act more like macOS.
Get your keyboard right
The first step is to make your keyboard act like an Apple keyboard. I'm using an Apple Wireless Keyboard—the old one with the nice scissor switches. It's never done me wrong in the past 8 years or so. A lot of the below should generally work with any old keyboard, though.
The first step is to into your keyboard settings and change the default keyboard to English (Macintosh). It doesn't matter if you're not using an actual Apple keyboard—the whole point here is to expose a special software key called ISO_Level3_Shift that exists on Apple keyboards (as the right Alt/Option key) but not on a lot of other keyboards.
Open the Settings app and navigate to Language and Region → Input Sources → + → English (United States) → English (Macintosh).
By clicking the little keyboard icon, you can see a map of the keyboard:
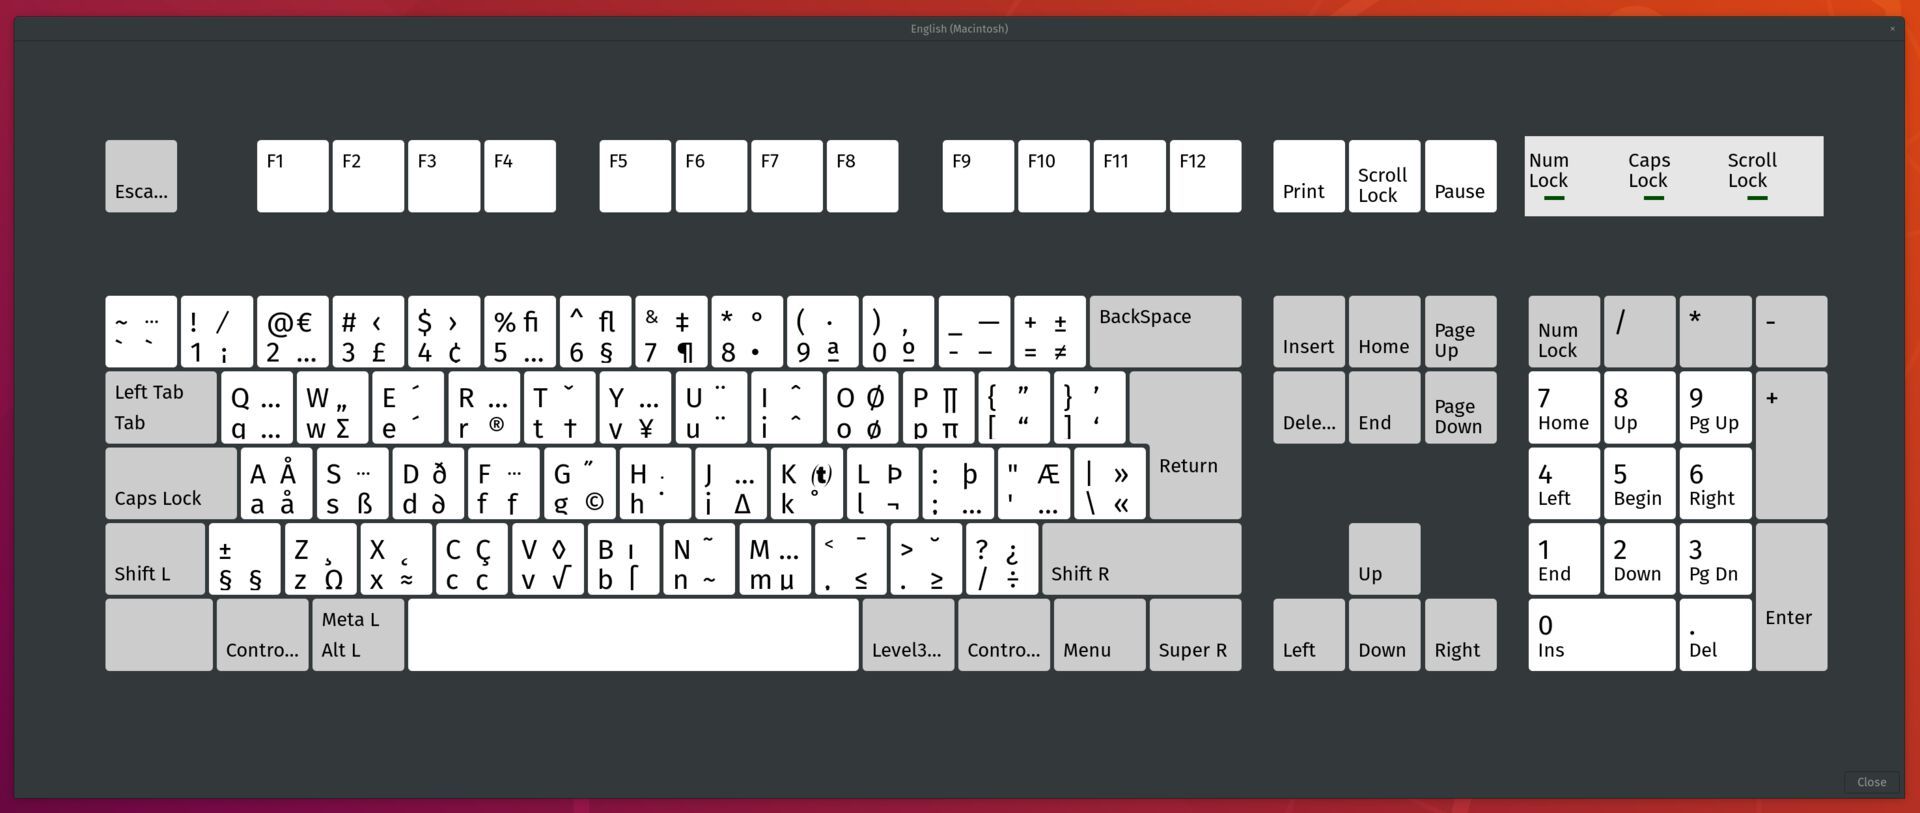
⚠️ On the image above, you'll find the ISO_Level3_Shift key to the right of the spacebar, labelled Level3.... You can read up more about it here.
You don't actually need to do anything with this image. Just know that Ubuntu thinks that you have a key on your keyboard that triggers the ISO_Level3_Shift software key. If you're using an Apple keyboard, you actually do have that key—but you're not likely to spend much time pressing it.
Swap Super and Ctrl
This is actually a lot easier than you'd think.
Ubuntu actually has a keyboard remapper built in: it's called xkb and manifests as a series of configuration files for all sorts of different keyboards. The keyboard that you want to edit is called pc; the config file can be edited by running the following command:
$ sudo nano /usr/share/X11/xkb/symbols/pcOur goal here is to swap around the Cmd/Super key and Ctrl key, so that our hardware Cmd key triggers the software Ctrl, and so that our hardware Ctrl key triggers the software Super key. That's nice and simple, but it's not exactly what we want, since the Super key does trigger stuff in Ubuntu, like the app launcher.
Think about it: if our hardware Ctrl key triggers the software Super key, we'd wind up opening the app launcher every time we went for a Ctrl+N to navigate to the next line. Or we'd wind up triggering the notification list when we wanted to paste (Super+V).
What we really need here is to bind our hardware Ctrl key to some software key that Ubuntu recognises, but which doesn't do anything. This is where that ISO_Level3_Shift key from before comes into play. If we bind our hardware Ctrl to the software ISO_Level3_Shift, we can then use a clever utility called Key Mapper (which we'll address in the next step) to add a bunch of custom key shortcuts that won't conflict with any of Ubuntu's default shortcuts.
With that all in mind, let's finally update our XKB config:
key <LCTL> { [ Level3_Shift ] };
key <LWIN> { [ Control_L ] };
# ...
key <RCTL> { [ Super_R ] };
key <RWIN> { [ Control_R ] };
What we're telling Ubuntu in the above is, line by line:
- When the left hardware
Ctrlkey is pressed, trigger a softwareISO_Level3_Shift - When the left hardware
Cmdkey is pressed, trigger a software leftCtrl - When the right hardware
Ctrlkey is pressed, trigger a softwareSuper(there isn't a rightCtrlkey on Apple Wireless Keyboards, so this doesn't really do anything, but is good for compatibility if you have any other keyboards around) - When the right hardware
Cmdkey is pressed, trigger a software rightCtrl
Once the above changes are made, hit Ctrl+X (your hardware Ctrl key) and then Y to save your changes. You'll then have to restart your computer (or in my case, the VM) to apply the changes.
With that, you're done with the hardest part! The rest is basically all just clicking around in various app windows. It's tea time 🍵
Key mapper
Go download Key Mapper. It's a snappy little utility that allows you to remap software key presses to other software key presses. In terms of the stack, it sits "above" XKB. XKB receives hardware keypresses and translates them into software; Key Mapper receives software keypresses and translates them into other software keypresses.
Once that's installed, fire it up. Key Mapper is pretty intuitive—mostly because it doesn't do much. I've got the following config set up; all but the last 2 entries should look familiar if you use Emacs regularly. The last two are ones that I made up, and now I've got the muscle memory for them and I can't go back.
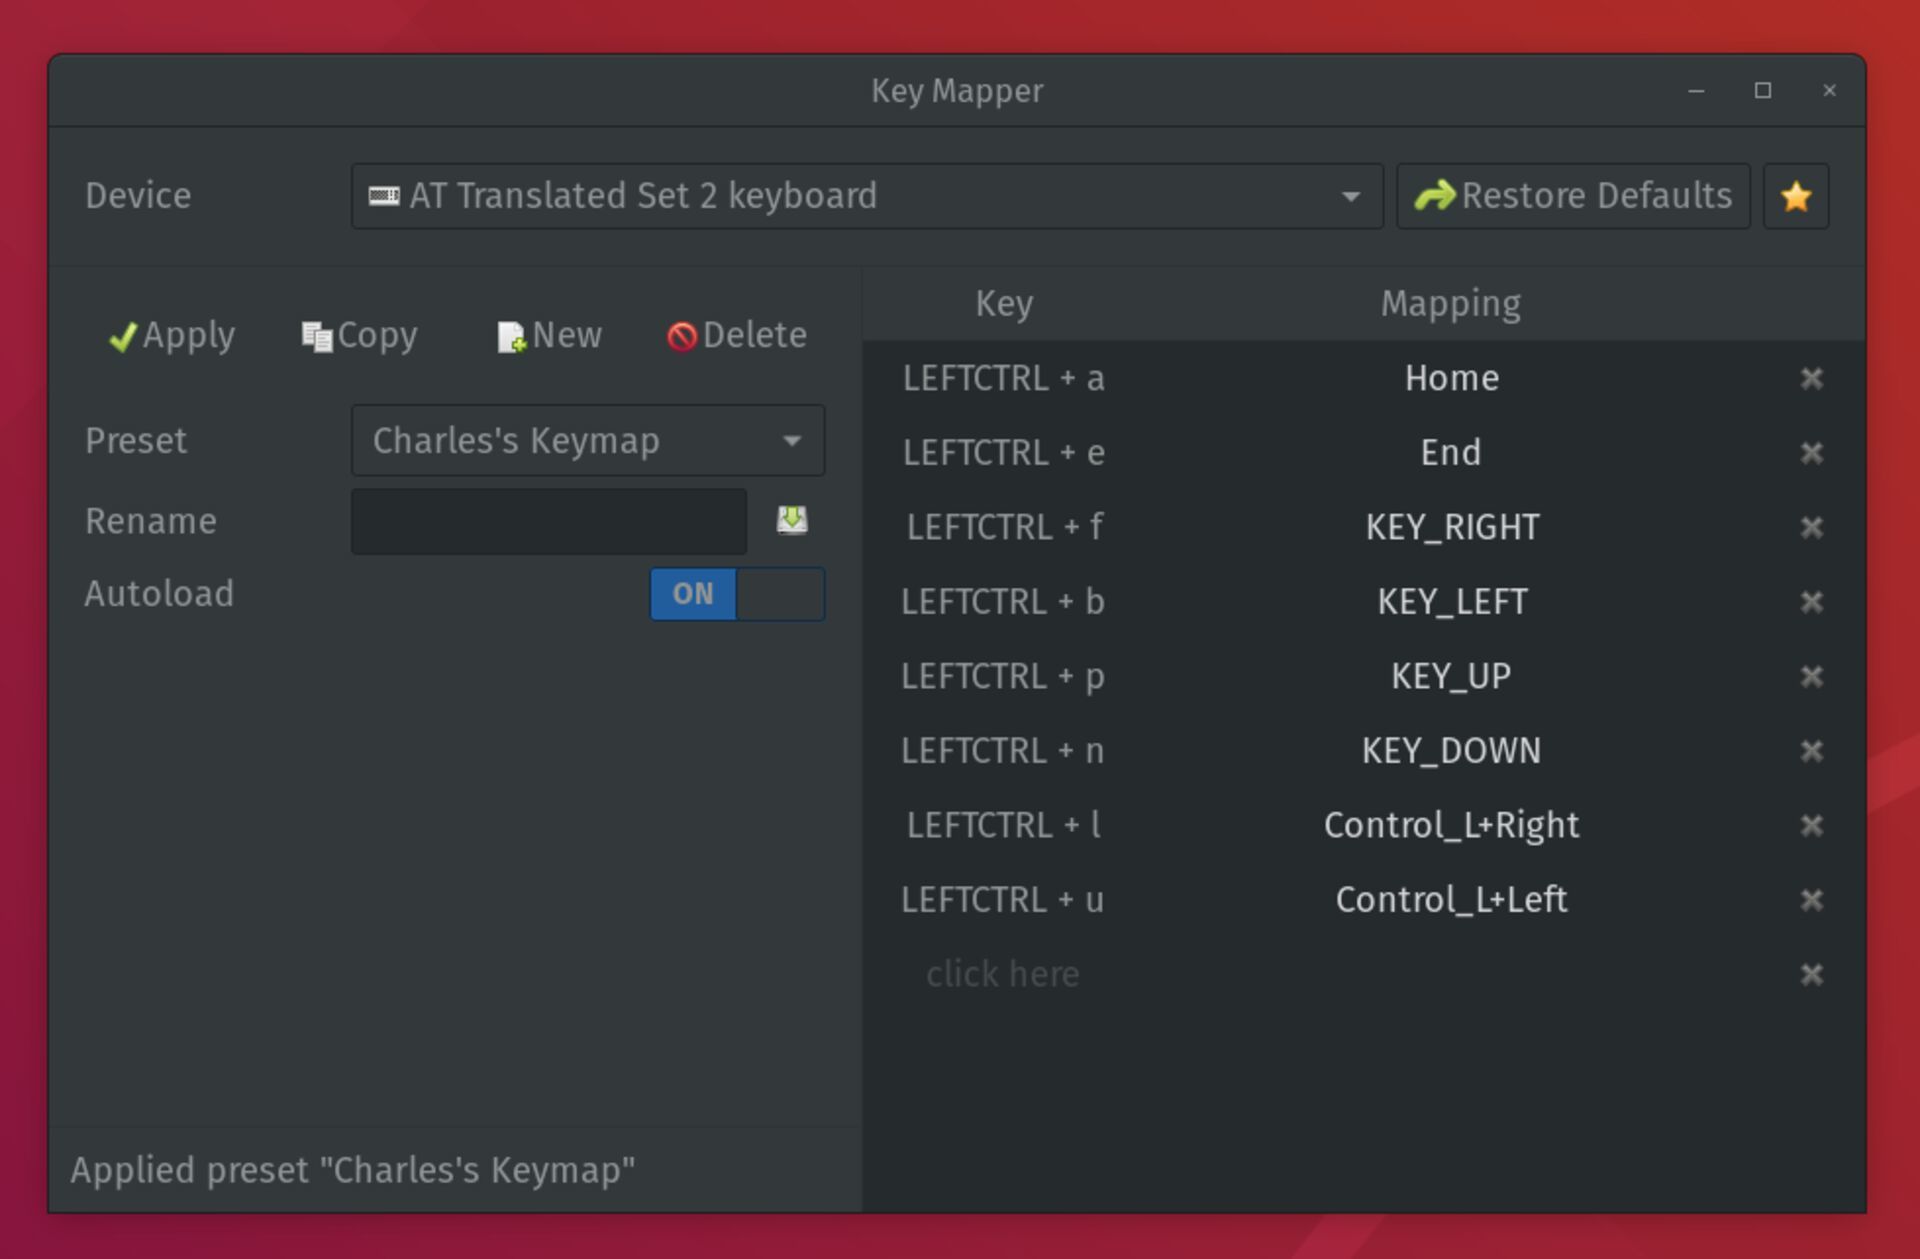
Key Mapper reads the ISO_Level3_Shift as LEFTCTRL for some reason; I'm not sure why. Just keep it in mind as you go.
Notice that I've mapped the Emacs navigation bindings to the arrow keys—the benefit of doing this is that you can use those same keybindings to navigate anywhere else in the OS—Ctrl+N for navigating down autocomplete lists; Ctrl+B/F for navigating backwards and forwards through lists.
Fit & finish
Now that the keyboard is behaving like it does on macOS, it's time to make the UI feel like macOS. We're not trying to make Ubuntu look like macOS: the feeling is what's important here. There are countless theme packs that provide macOS-style folder icons and traffic lights for window management, and all of them are untempered crap. This guide is about building a cohesive, balanced UI that emulates the ethos of macOS—not the look.
Keyboard repeat speed
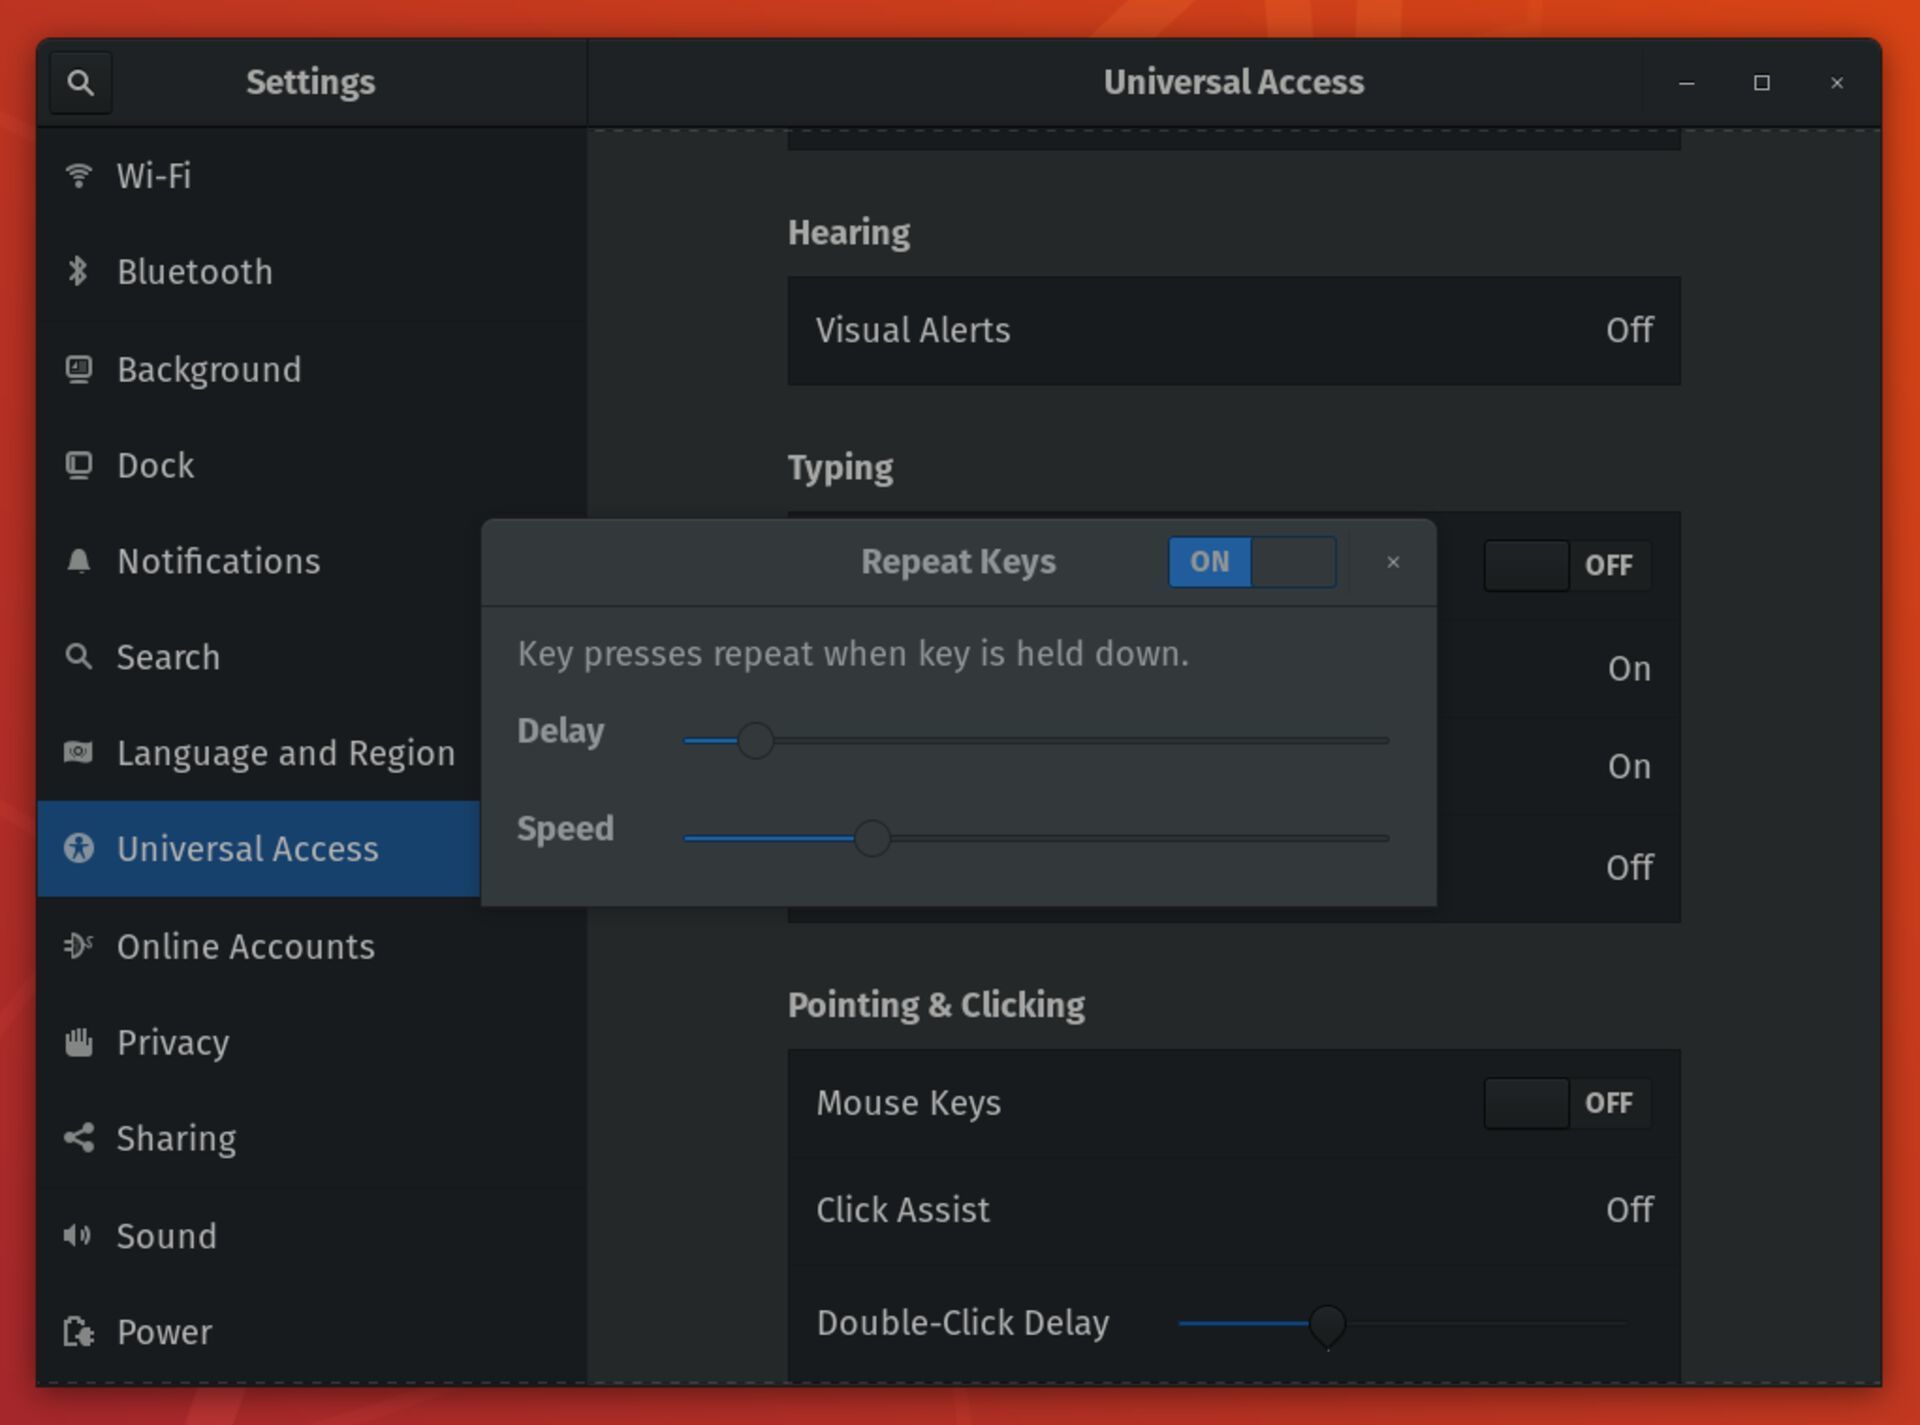
This one isn't strictly about matching up with macOS behaviour, but adjusting the key repeat speed is one of the first things I do when working with a new installation of macOS, so it stands to reason that I'd want to adjust it here too. The default repeat speed on Ubuntu is pretty good, but the delay until the repeat starts is much too long.
Open up the Settings app and navigate to Universal Access in the left sidebar. Scroll down to Typing and click the Repeat Keys list item to trigger the dialogue for adjusting those values. For reference, this feels about the same as the shortest delay and fastest repeat setting on macOS:
Cmd+Tab, Cmd+`
Cmd+Tab brings up the macOS app switcher; Ubuntu has something very similar. Open up your Settings app and navigate to Devices → Keyboard. Under the Navigation heading, you'll find an entry called "Switch Applications"; click on the shortcut and hit Cmd+Tab to change it over.
⚠️ Because you've remapped Cmd to Ctrl, it'll show up in the Settings app as Ctrl+Tab. Just a heads-up.
Scroll a little bit further down and find the entry called "Switch windows of an application" and change it to Cmd+`–this'll give you the nice switching between application windows, same as on macOS.
Caveat: this isn't exactly the same as macOS: on a Mac you can Cmd+Tab to bring up the switcher, then Cmd+` to navigate backwards through the switcher. GNOME doesn't let us do that.
We're not going to remap the "Show all applications" keybinding, since we're installing an app launcher below—but just as a heads up, if you want something like the "All applications" pane on macOS, you could remap "Show all applications" to F4, which is the "All applications" key on 2012-vintage Apple Keyboards.
Fonts
The default Ubuntu font interface looks awful. It looks awful on high-definition screens; it looks awful on low-definition screens. It looks awful both in light mode and in dark mode. I've yet to meet someone who likes the default Ubuntu font.
Luckily, we can change this.
The first step is to install an application called gnome-tweaks, which gives you a nice GUI for a bunch of OS-level tweaks. You could make these changes on the command line—but why would you? Who are you, Richard Stallman?
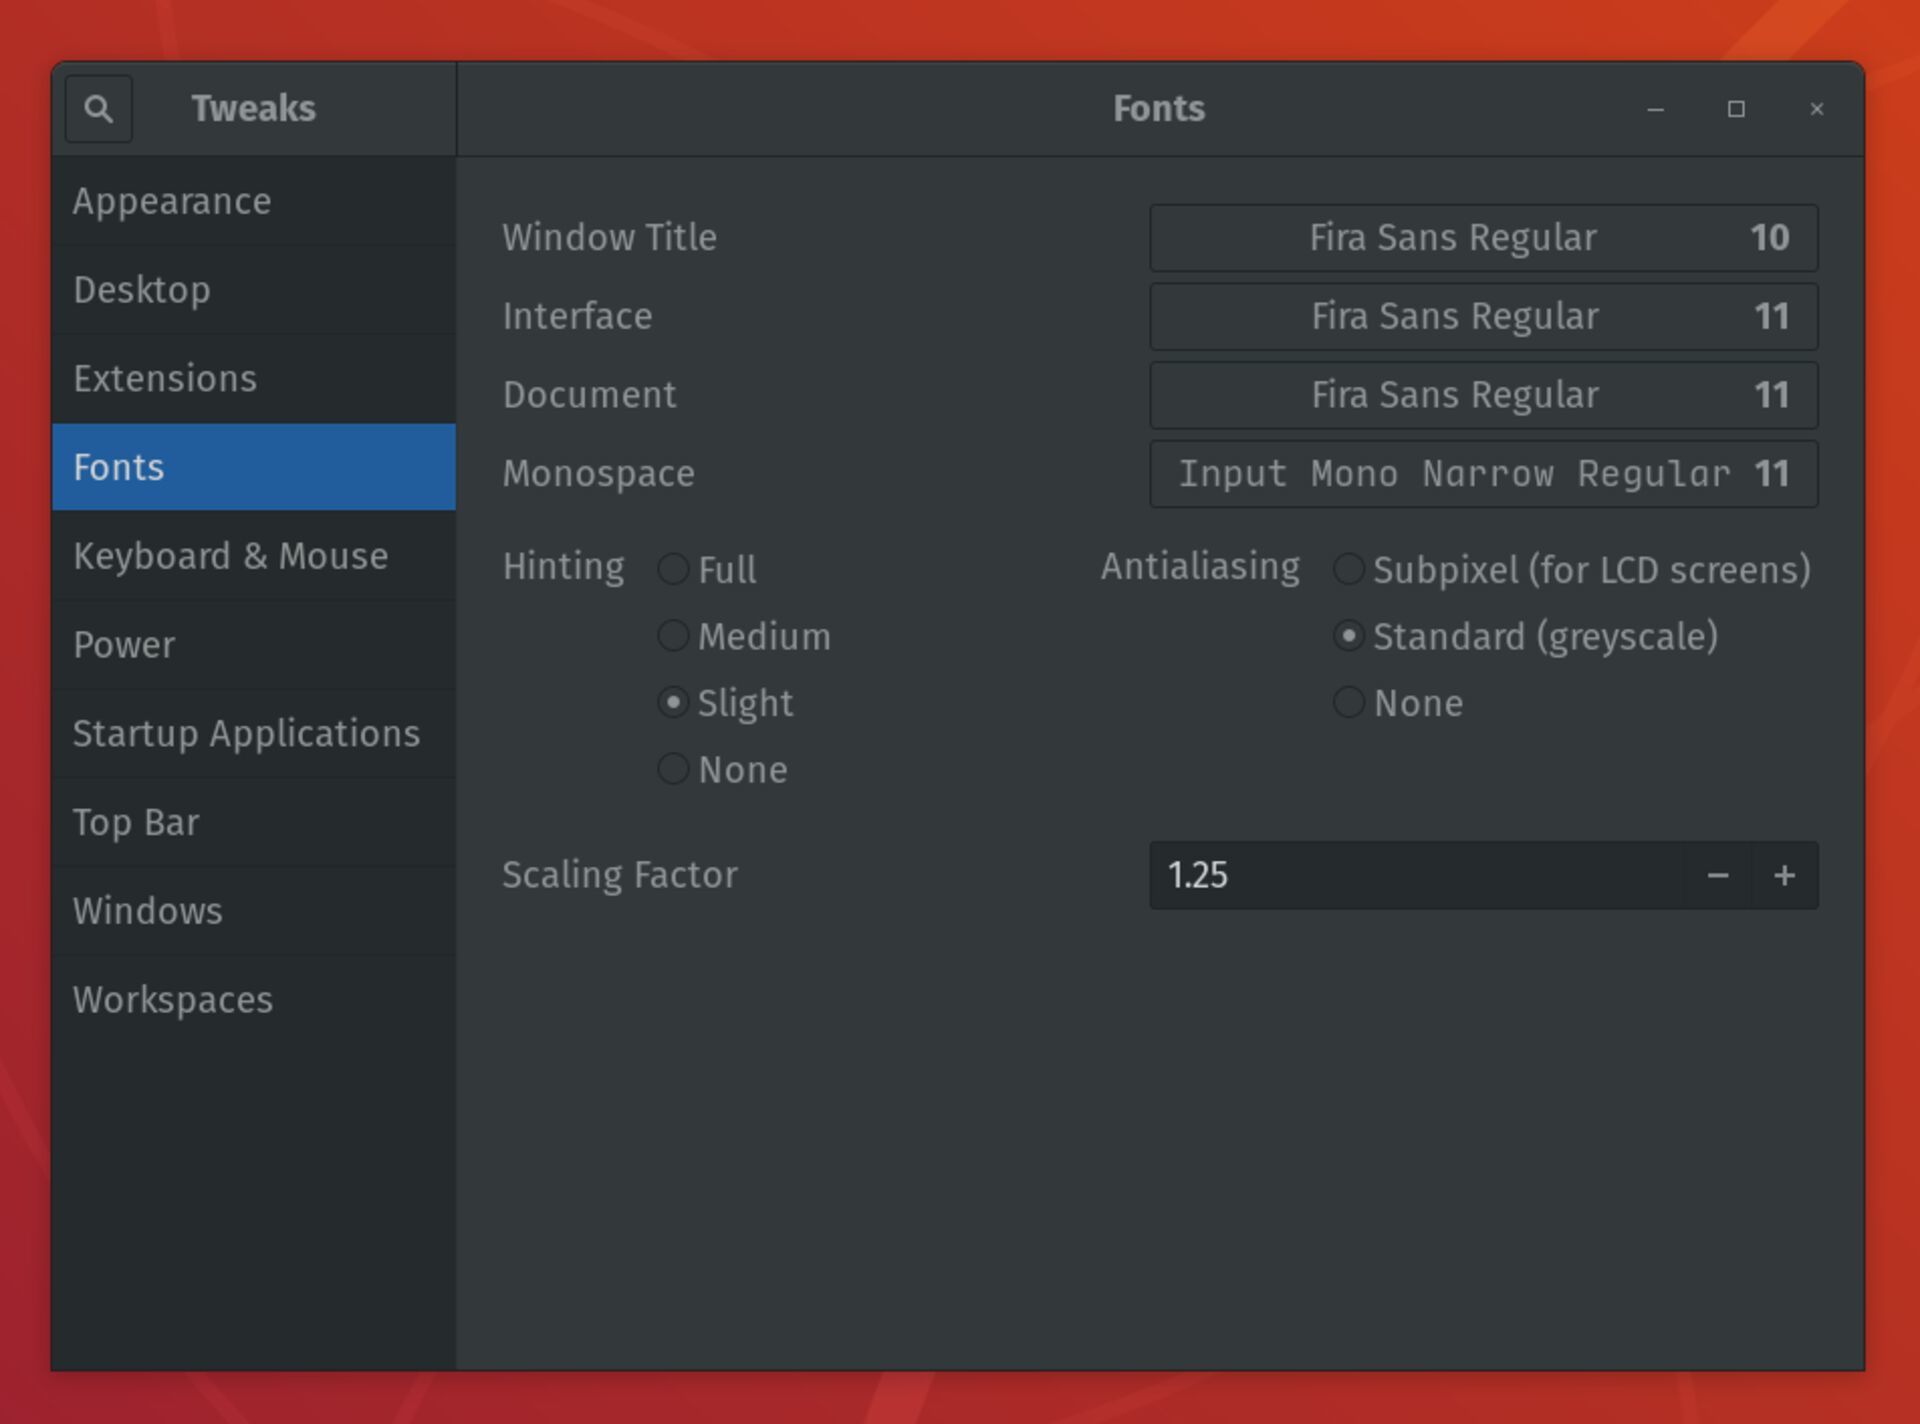
$ sudo apt install gnome-tweaksEveryone's going to have their own preferred fonts so this is personal. Before you get ahead of yourself, San Francisco looks rubbish here: something must be off with font-rendering. The Go fonts work surprisingly well: serious, a little academic, unstuffy. For me, the high x-height and narrowish letters of Fira Sans look great. I consider its widespread use across European public transit systems more than recommendation enough. You can download it from Google Fonts here.
Once your font of choice is downloaded, you can fire up gnome-tweaks (it's just called Tweaks in the application launcher), click Fonts in the sidebar, and change things up to your heart's content.
Fonts part 2
You'll probably notice that parts of the interface don't respect the font that you've set in the previous section, though: the top bar, for instance, along with any top bar-anchored chrome like the logout/power dropdown; the application launcher and application names on hover in the Dock, that sort of thing.
For that we need to go a step further—we need to actually edit the Gnome theme we're using.
First, we need to figure out what version of Gnome shell we're running; easily done on the command line:
$ gnome-shell --version
GNOME Shell 3.28.4
I'm running 3.28.4 but it's possible that you'll be on something else.
Head over here to download the Gnome User Tweaks extension, using the Gnome version from just above. For Extension Version, just select whichever is the highest. This extension works with the Gnome Tweaks application we installed in the previous section, and getting it up and running is a little tricky—so we're going to break it down.
First, make sure that you have an extensions directory set up on your machine:
$ mkdir ~/.local/share/gnome-shell/extensionsThen, you'll want to extract the zip file that you just downloaded into that directory. The filename that you unzip into is important, though: it has to be [email protected]:
$ unzip ~/Downloads/user-theme@gnome-shell-extensions.gcampax.github.com.vXX.shell-extension.zip \
 -d ~/.local/share/gnome-shell/extensions/[email protected]
Make sure that you change the vXX to the appropriate version number.
Now that you've got it all downloaded, log out and log back in again, and open your Gnome Tweaks application. Click Extensions in the left sidebar, and you should see the User themes extension available to you:
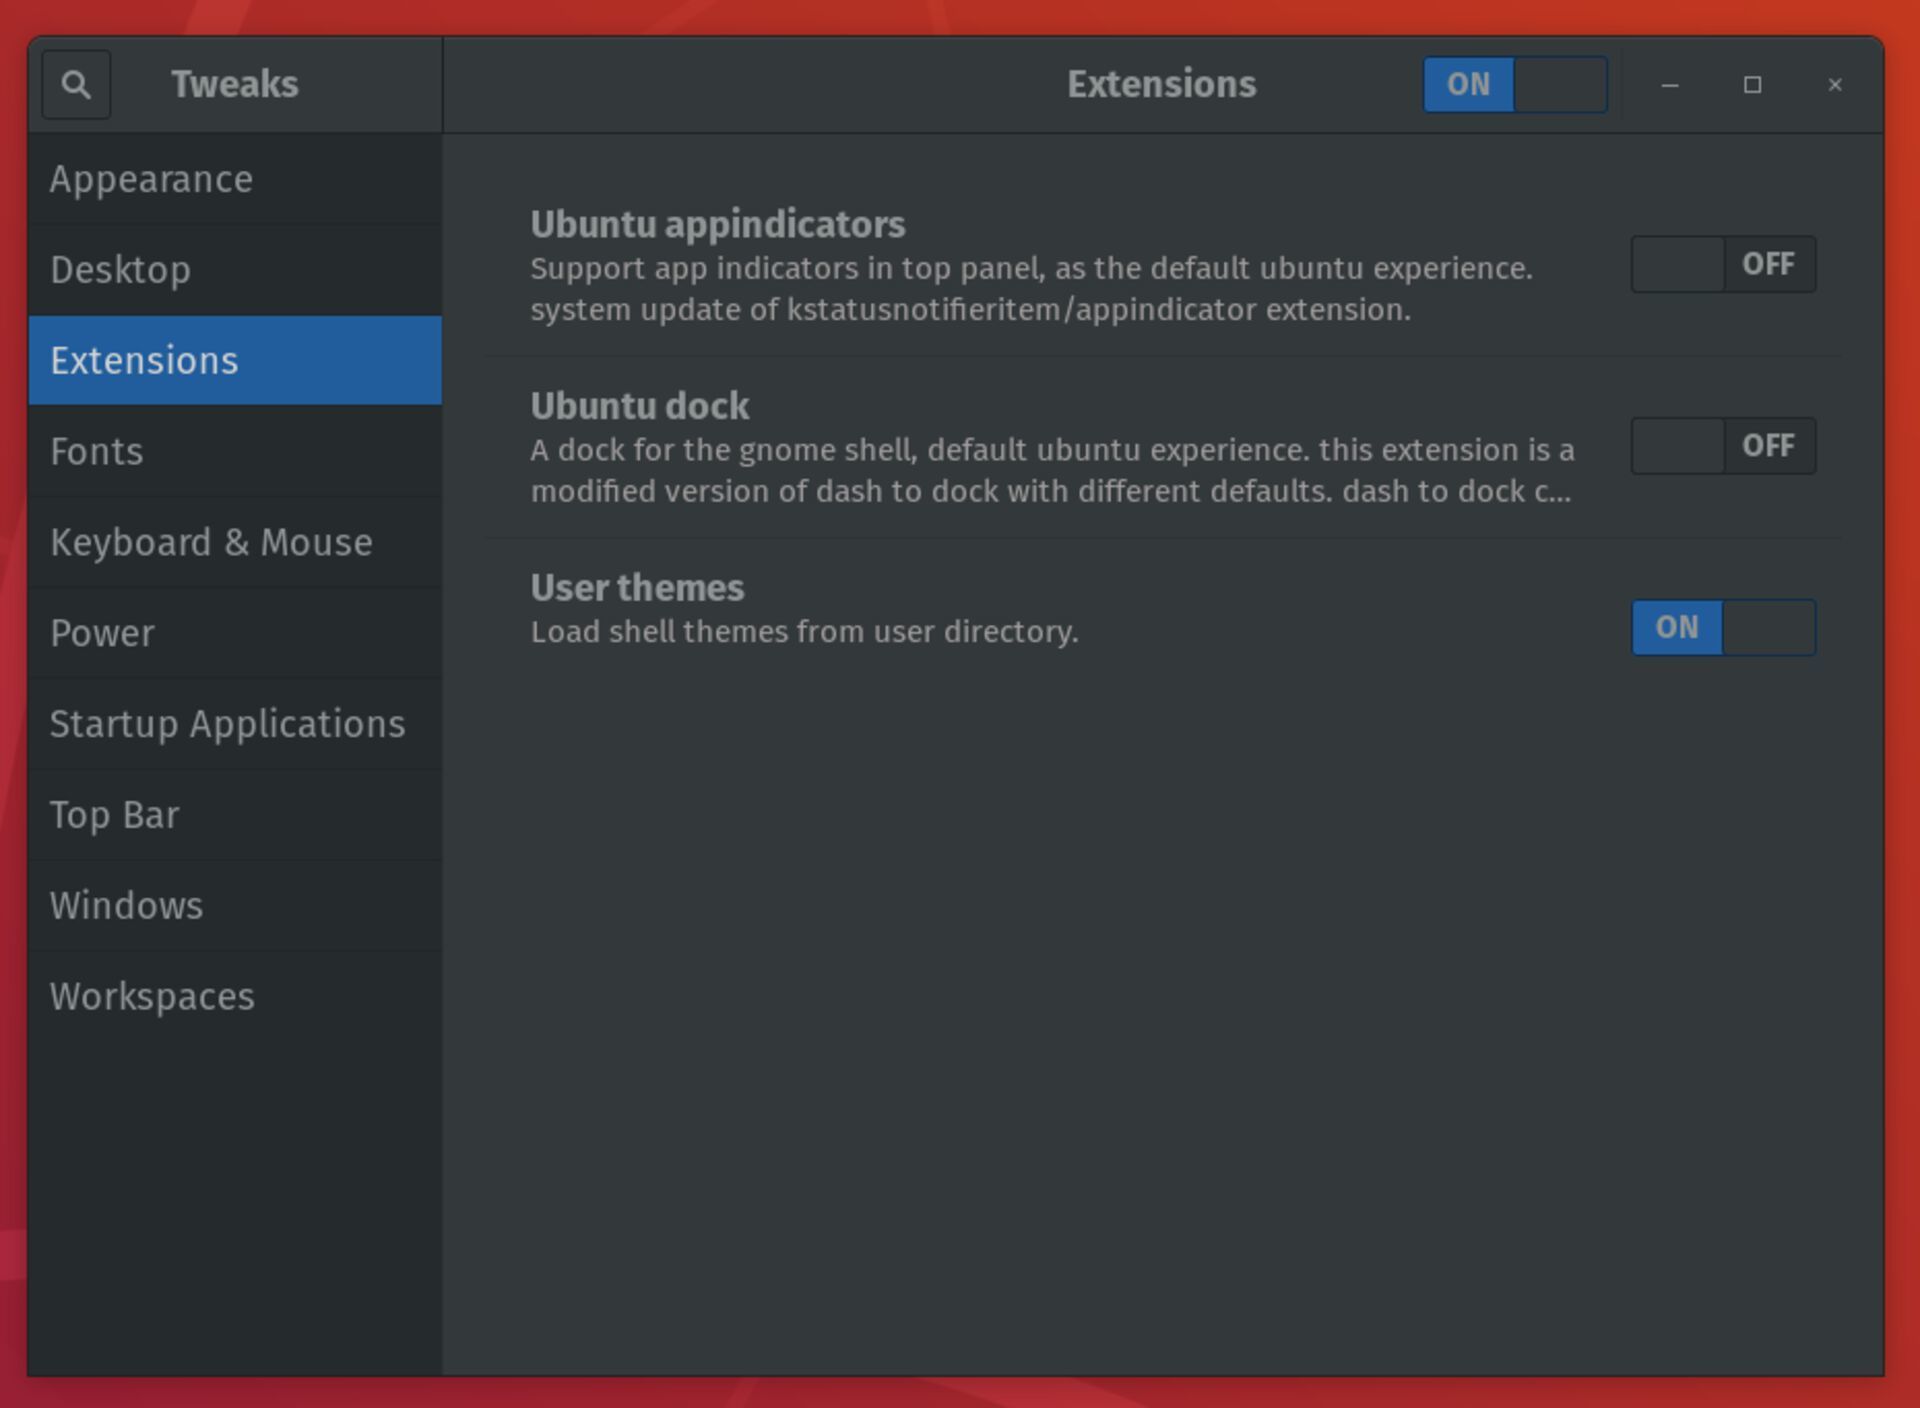
Toggle User themes on, close Gnome Tweaks, and then reopen it.
Next, you have to create your custom theme. Figure out what theme you're currently using (I'm using Adwaita-dark), and find the default CSS file in /usr/share/themes/Adwaita-dark/gtk-3.0/gtk.css. Mark down that path.
Now create a custom user theme in the ~/.themes directory, using a theme name of your choosing, and create a theme stylesheet:
$ mkdir -p ~/.themes/MyTheme/gnome-shell
$ touch ~/.themes/MyTheme/gnome-shell/gnome-shell.css
In that CSS file is where you'll put your styles:
/* Import your default theme from before */
@import url(/usr/share/themes/Adwaita-dark/gtk-3.0/gtk.css);
stage {
  font-family: 'Fira Sans', Sans-Serif;
  font-size: 12pt;
}
I'm using 'Fira Sans' here but you might be using something else.
Dark mode
Last item on the list, for you dark mode aficionados out there, is to head to the Appearance tab in gnome-tweaks and change the application theme to Adwaita-dark. This approximates a dark theme without actually being a dark theme—Chrome, for example, won't recognise that you're using a system level dark theme and will surface light themes for just about everything, blinding you regularly. There's not a ton you can do about that.
App launcher
Spotlight, the default application launcher on macOS, is decent, and there are even better ones available like Alfred and Raycast (the latter of which I use daily & w/ much vigour, and for which Linux support is apparently "on the roadmap" but is not a priority). The Ubuntu app launcher, unfortunately, isn't great. It does the job, but it's slow and reopens new instances of applications every time you try to switch.
Luckily, the aptly-named Albert fixes most of those complaints. It's not perfect, but it's a darn sight better than the default.
Installation & config
Install Albert using the instructions here.
Since Albert can't do OS-level things like clipboard history and window management out of the box, you'll also need to install a couple of commands that Albert will rely on behind the scenes. Install wmctrl using the following command:
sudo apt-get install wmctrlThen head over to the copyq homepage and follow the installation commands there. It should be as simple as adding the PPA and then installing it with apt.
Once that's done, log out and then log back in (or restart the computer), so that Albert picks up wmctrl.
Back in Ubuntu, open Albert using the regular old application launcher. It should automatically open the Settings pane if this is the first time Albert's been started. Under the General tab, check the Autostart on Login checkbox, as well as the Clear on hide checkbox. Make sure to set your Hotkey to Cmd+Space key, like Spotlight on macOS).
⚠️ Again, this will show up as Ctrl+Space since you've remapped the Cmd key above.
Styling
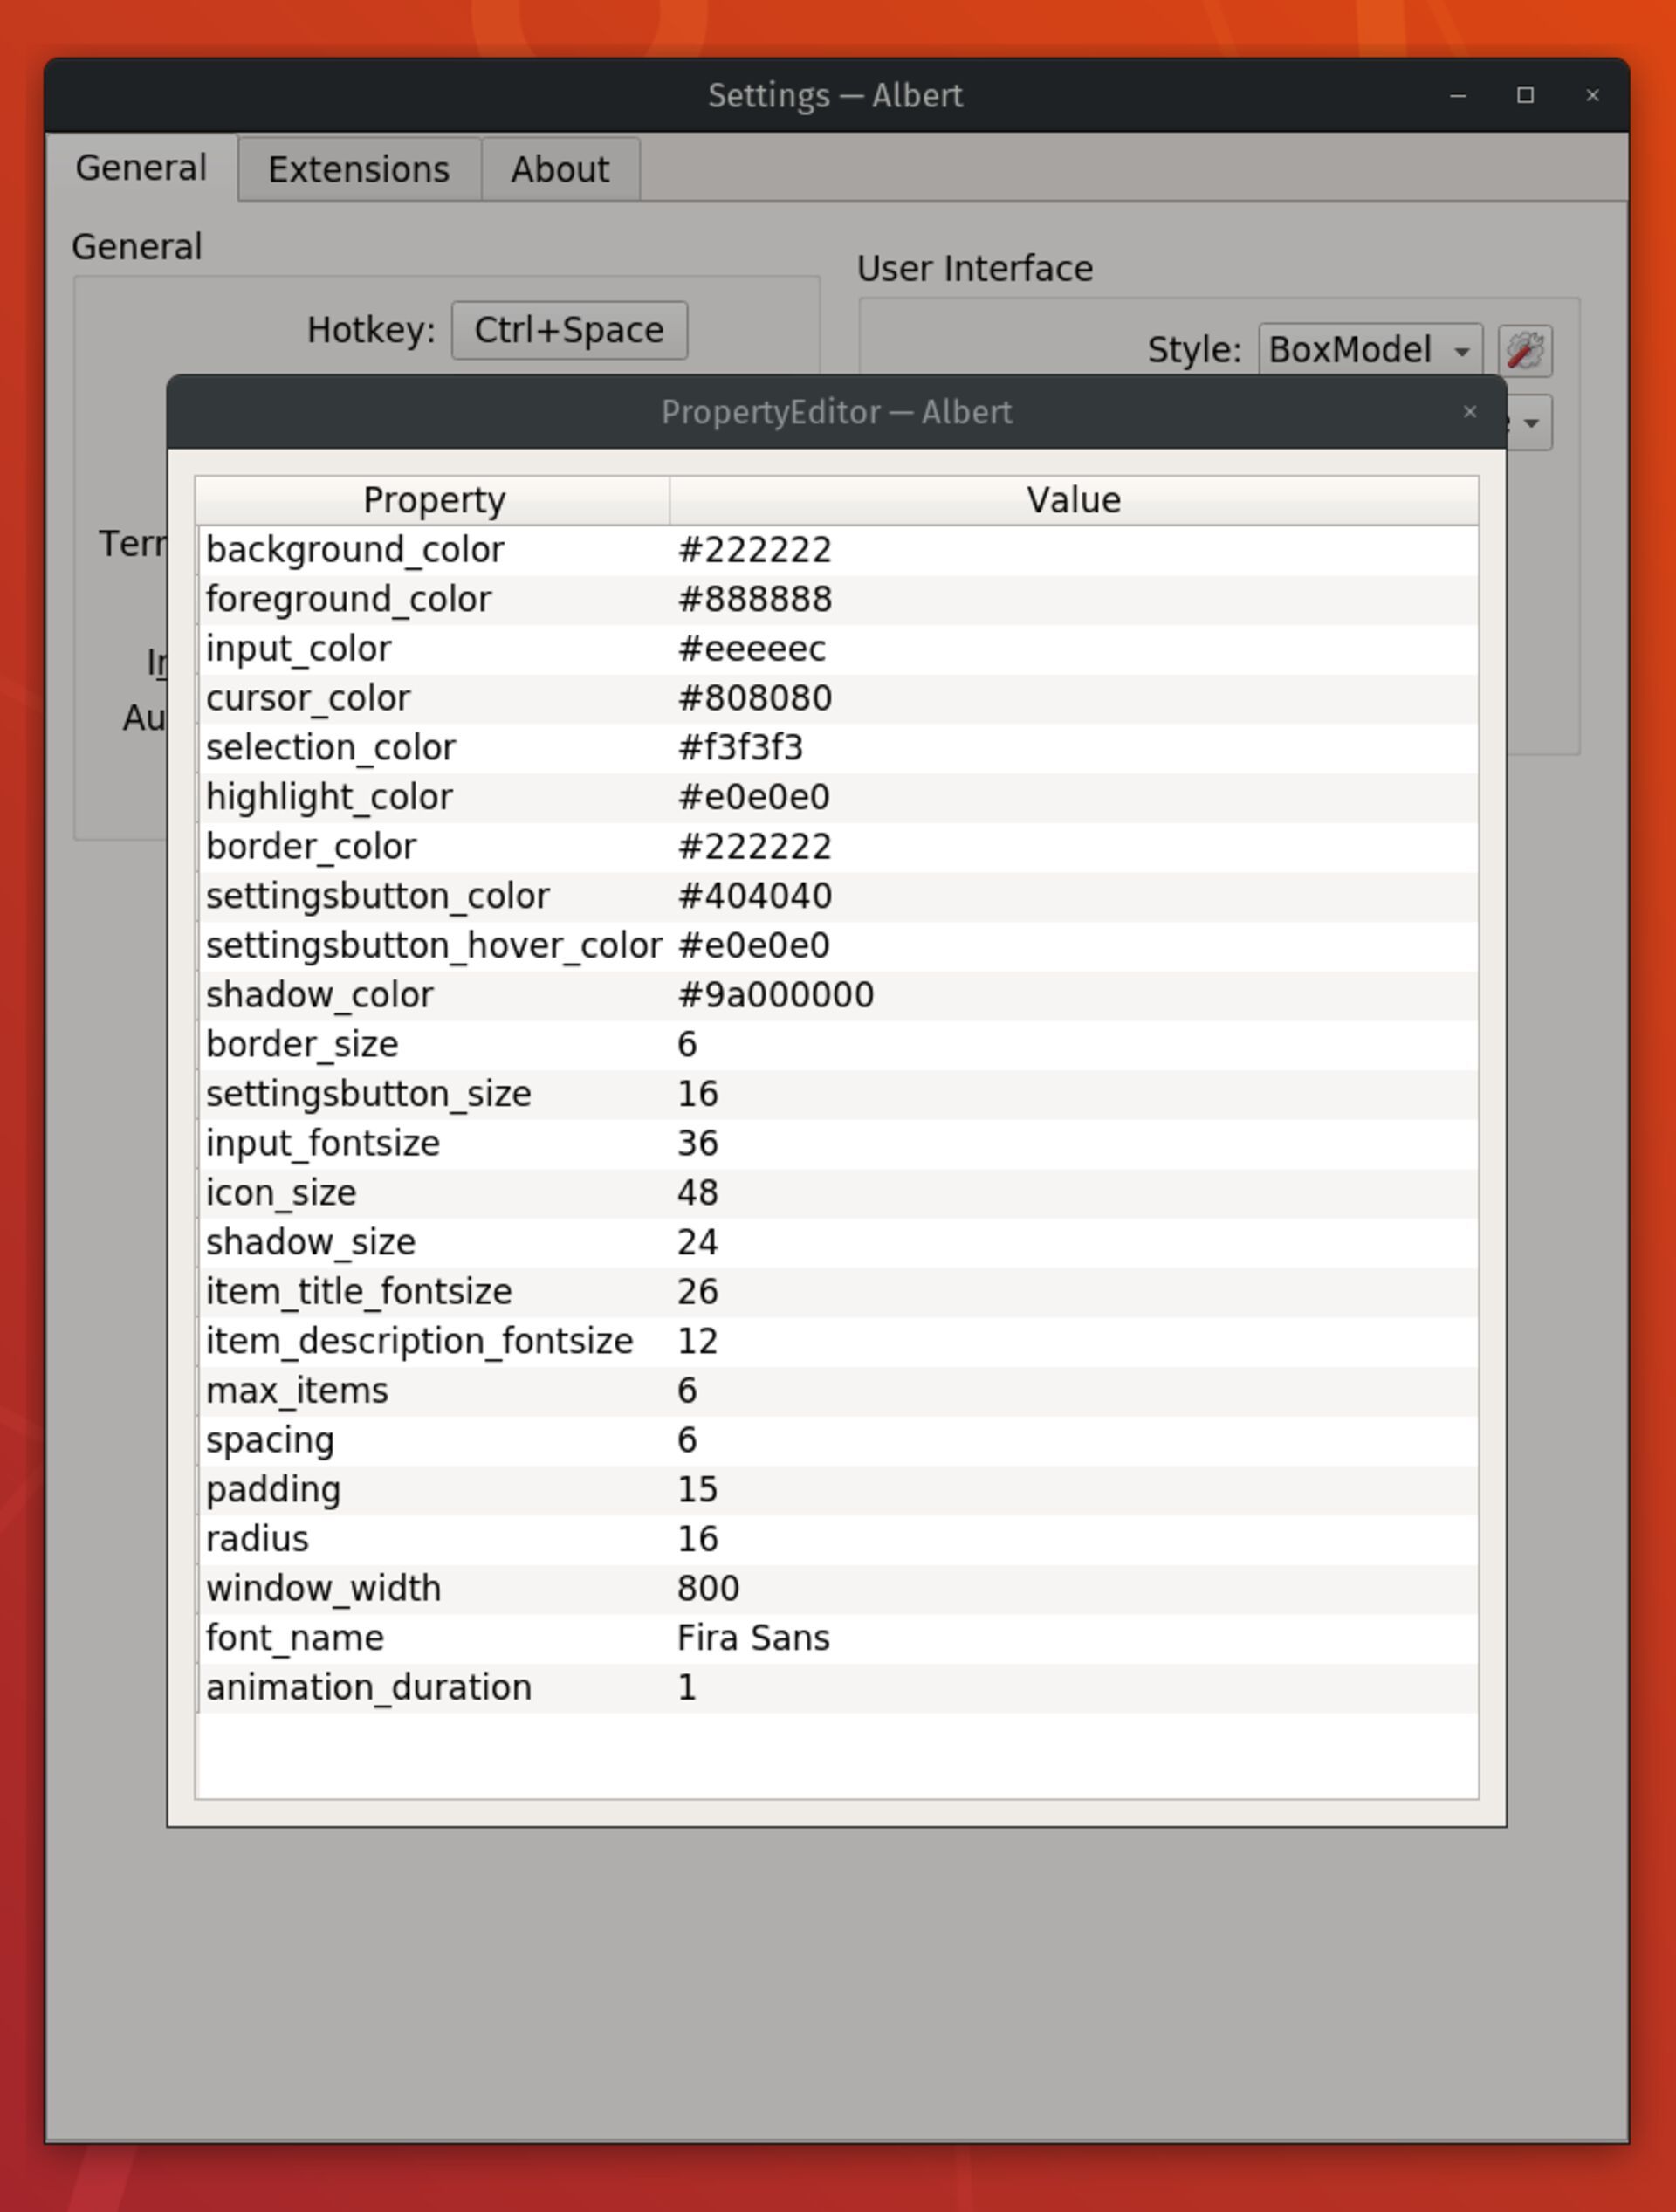
Then, select QML Box Model for the Frontend, click the cog next to the Style field, and update the settings to the following:
Extensions
After that, you'll want to enable some of the extensions—these are what make Albert practical. By default, I enable the following extensions:
- Applications
- Calculator
- Files
- MPRIS Control (allows you to play/pause/next track/etc from Albert)
- Python
- CopyQ
- Window Switcher
- Snippets
- System
- WebSearch
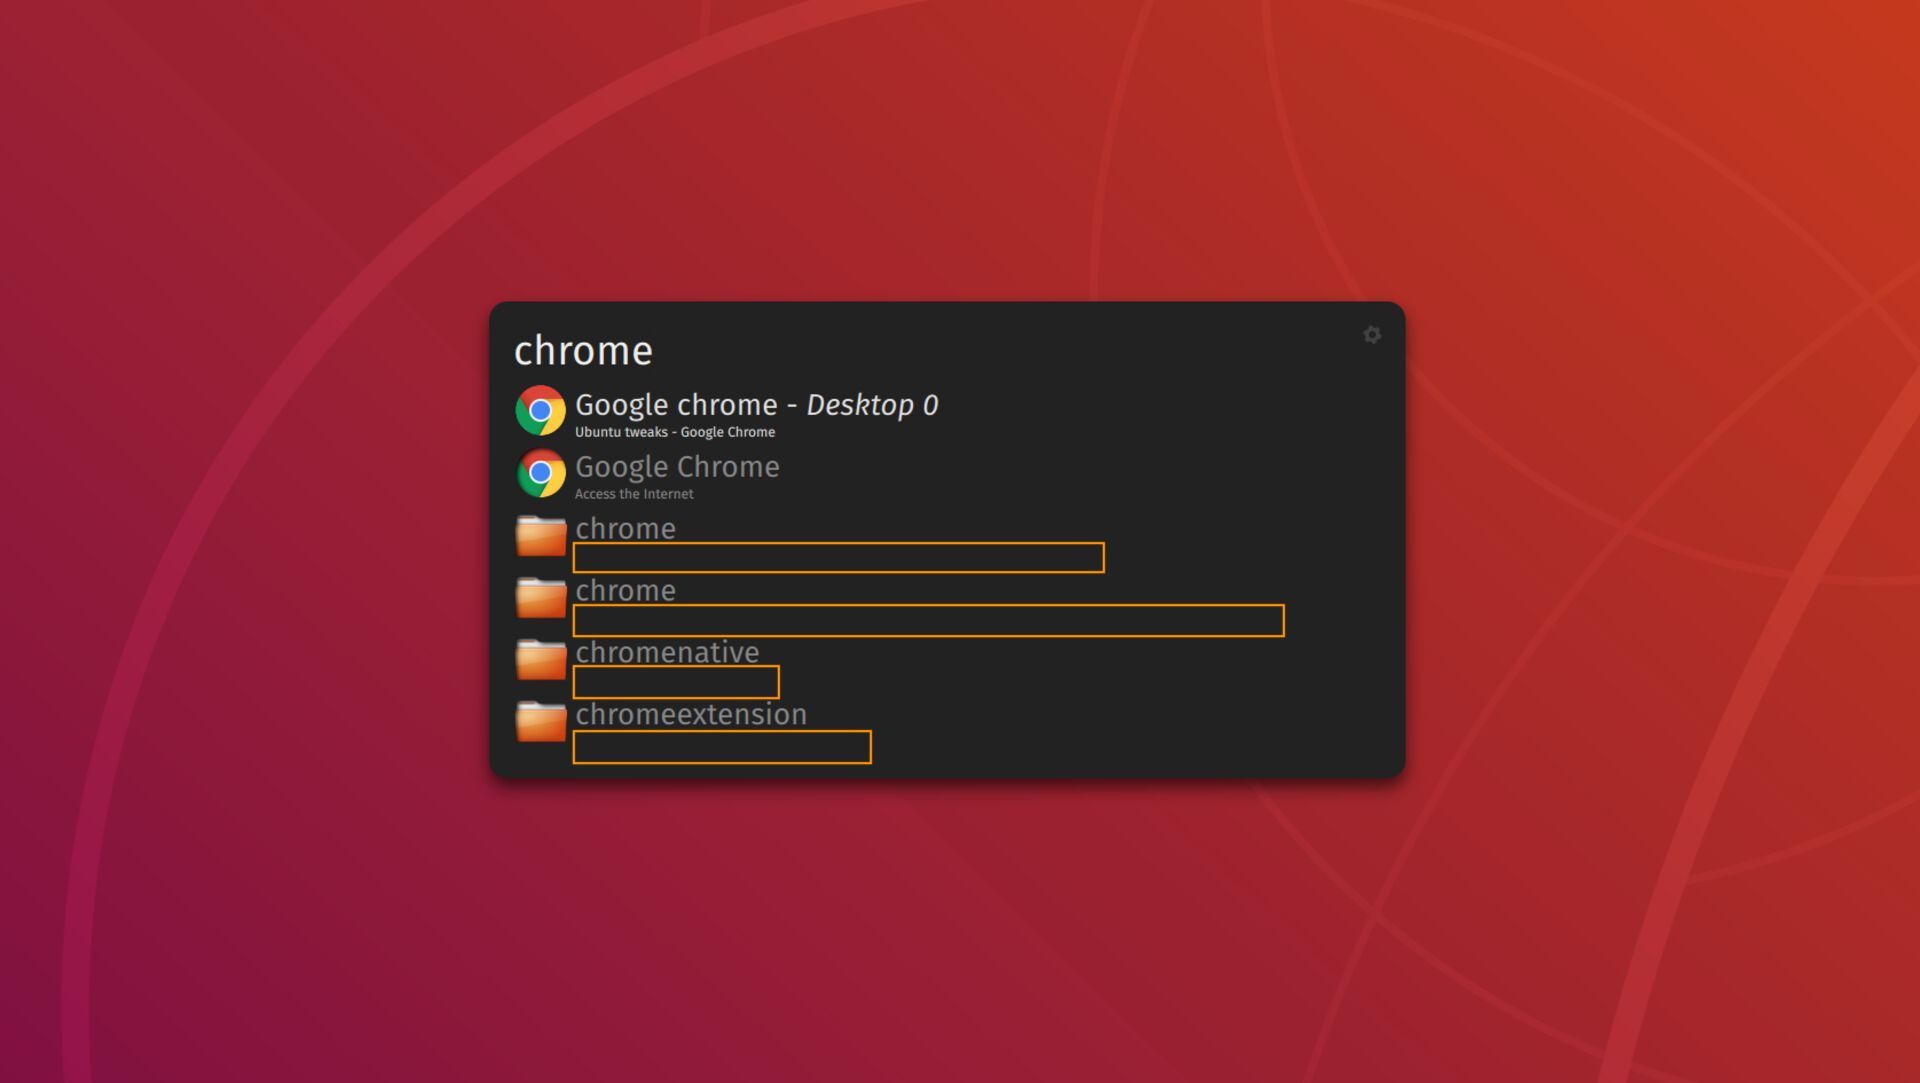
Most of these should work well right out of the box, but you'll want to click into the Python extension to configure your window manager. Scroll down to Window Switcher and enable it—this should allow you to switch to open windows within Albert, rather than opening a new instance of a window every time to switch applications. This comes in handy with applications like Chrome and Terminal, between which you'll probably be switching a buncha times a day.
Assuming all of the above has gone well, you should have something like this up and running:
And that's it
...so far. As I continue to use Ubuntu I'm discovering new tweaks all of the time, so I'll come back to update this guide as I go.
Next
Previous